This time last year, I had just completed a self-imposed week-long outfit challenge, using my three pairs of True Bias Hudson Pants to rid me of my January lockdown blues. I enjoyed it so much that I'd be tempted to repeat it if I wasn't expected to go into the office once a week nowadays.

Even without my tie-dye waffle version (I made that pair later on), I felt both cute and comfy in my choices. I shared the week as an Instagram stories highlight, and more recently, I popped the seven outfits in this quick reel


You see, up until last year, my loungewear consisted of ready-to-wear bleach-stained leggings or saggy PJ bottoms with thread-bare tees. Finding nice joggers that fit my shape has always been a challenge, but when True Bias released their high rise tutorial for the Hudson Pants, I knew that was a silhouette that could work for my body.

I get asked a lot of questions about the fit of my versions, probably because I can't stop waxing lyrical about them. So, if you're curious, as well as the high rise tutorial, I also followed these instructions for a full butt adjustment and added a little length to the front crotch too.


I find the construction oddly satisfying and the only fitting issue I've had, which many others have echoed too, is that the leg cuffs are too narrow as drafted. So it's wise to do a little measuring before you cut them out and add some width. I got away with sewing mine with a tiny seam allowance and shaving off some width from the leg pieces. I wouldn't recommend this method as you could end up having trouble getting your feet through the cuffs - I just took a chance as I know I have oddly narrow feet.

Other than that though, I absolutely love the Hudson Pants fit and design details. In particular, I'm a huge fan of the slim fit, the topstitched waistband (I made a reel sharing my top tips for a neat finish) and the pocket detail. Instead of making buttonholes for the drawstrings, I opted for metal eyelets which seem to be more durable, plus I really like how they look.

Be warned though, because the pockets are shallow and bordering on purely decorative. I don't mind as I only wear mine around the house and don't need to store anything in them, but you may want to add length if you need a functional pocket. 


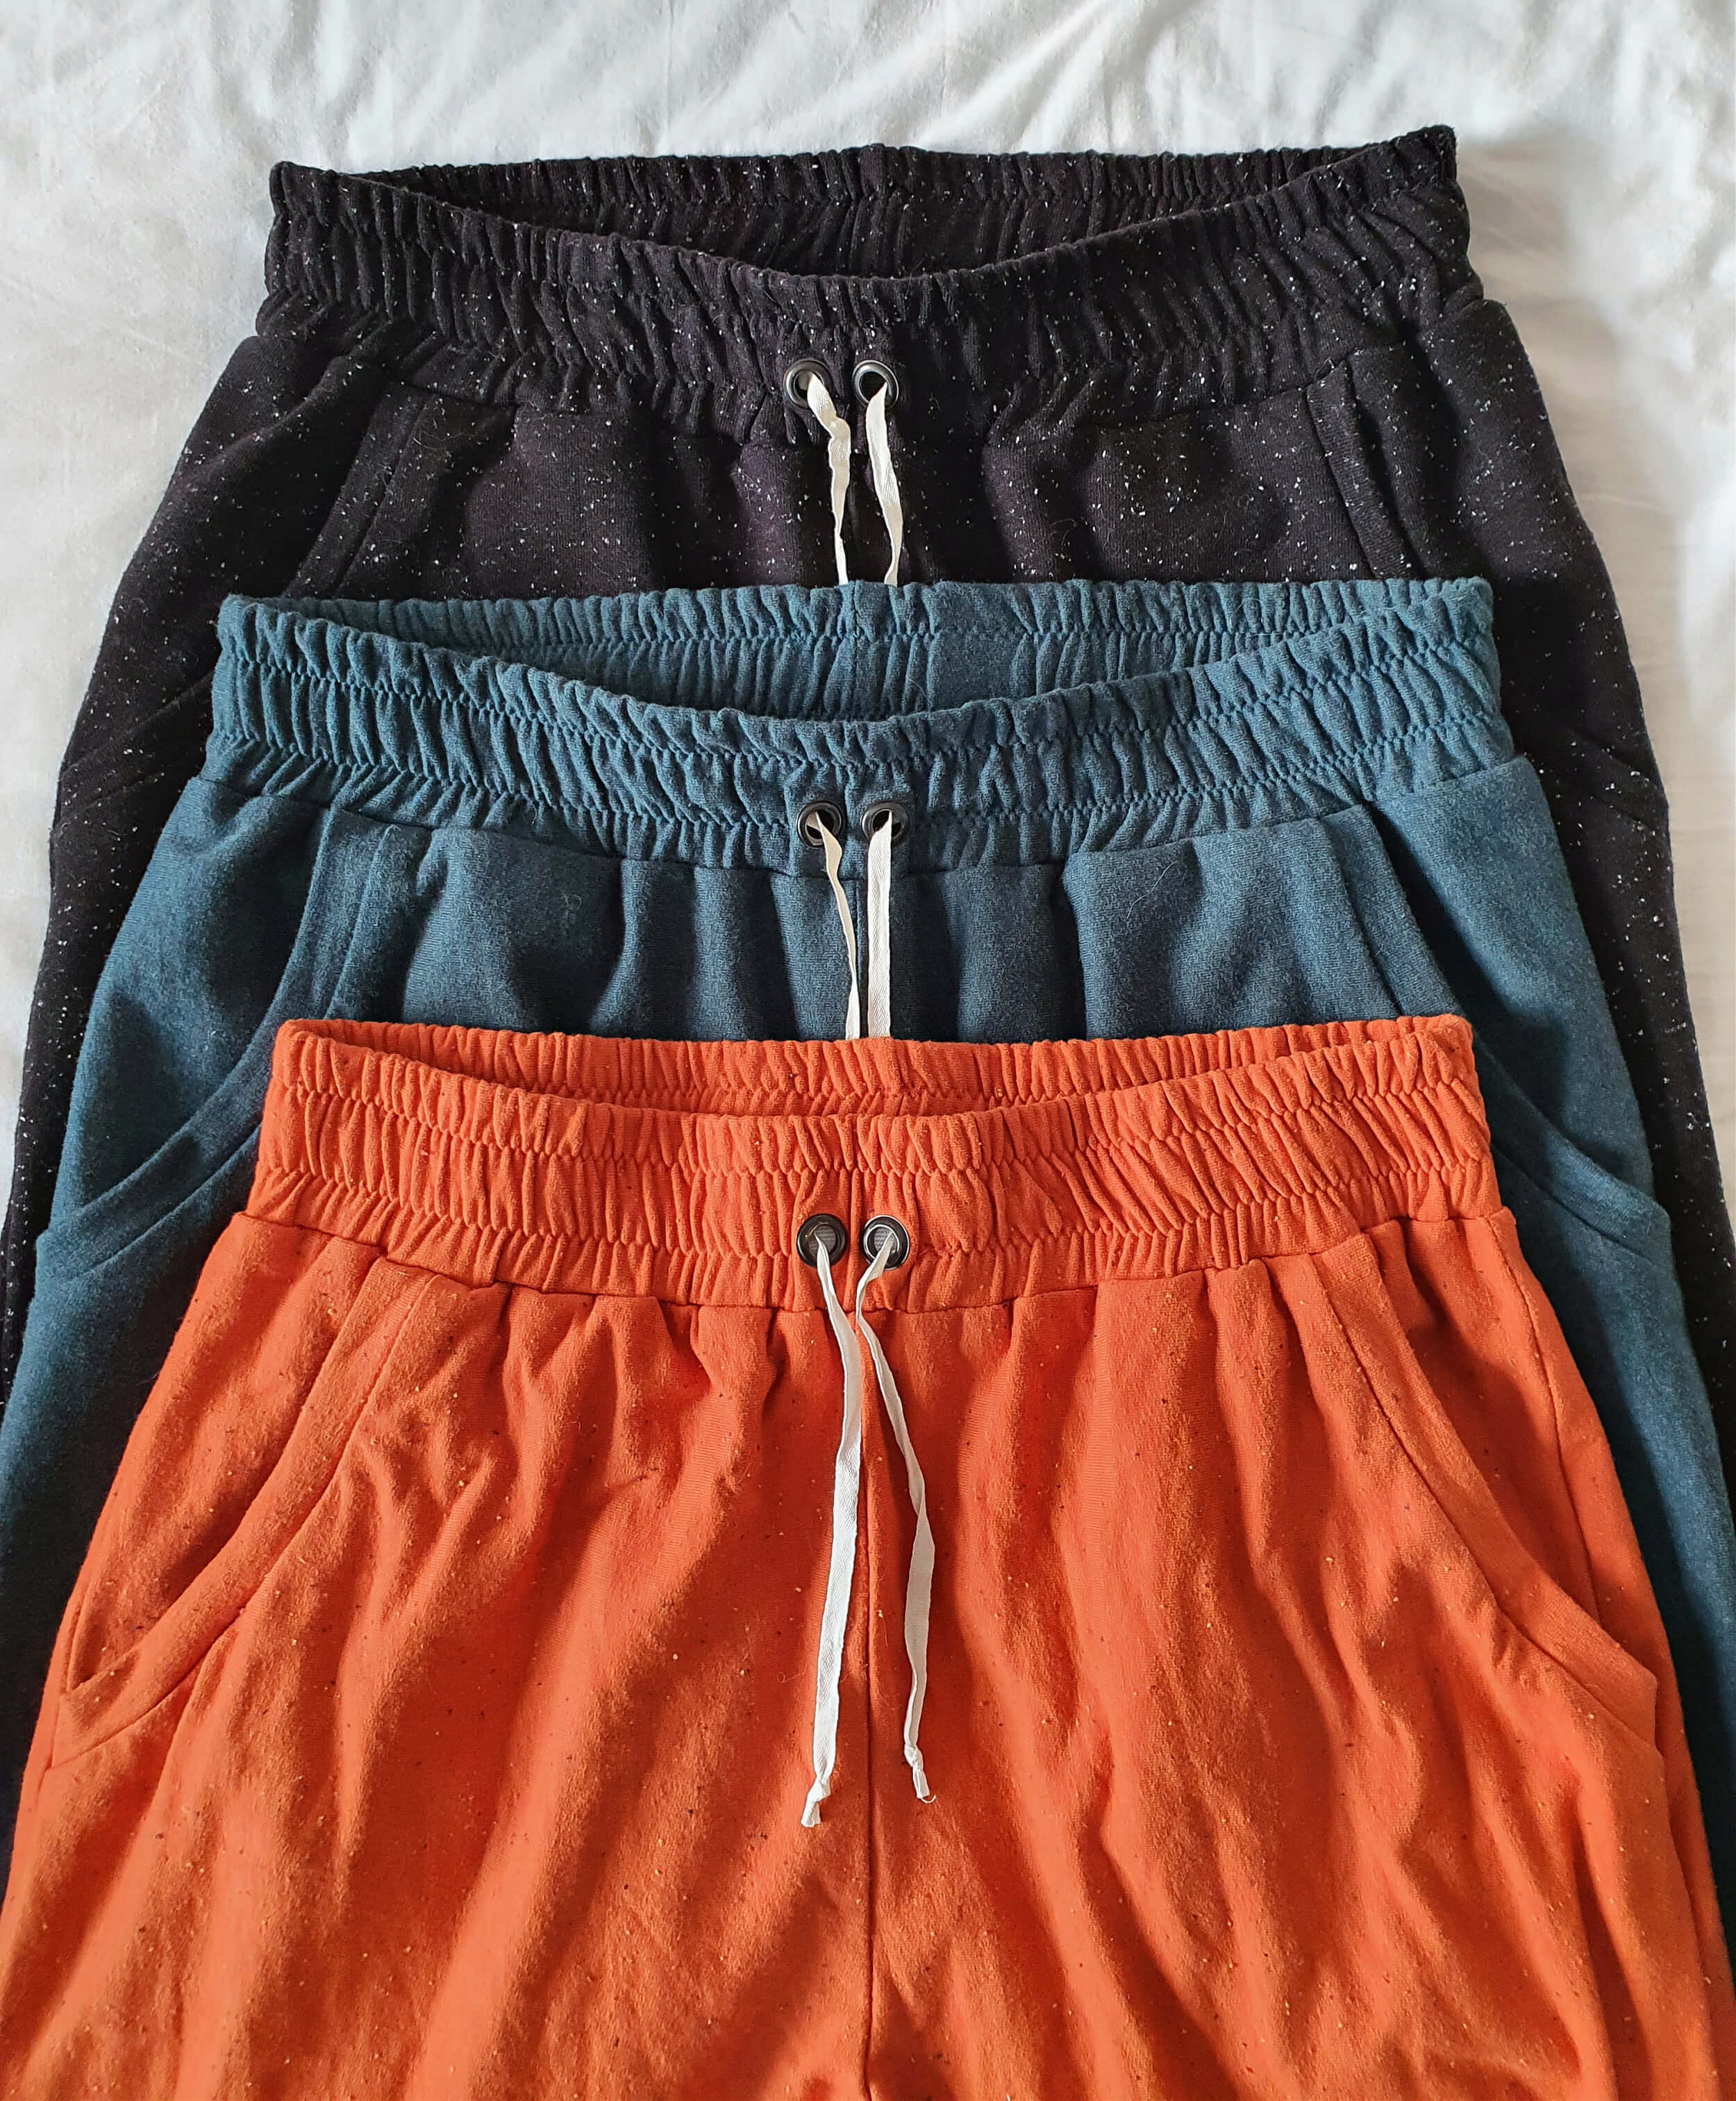
So far I've made four versions which are in regular rotation and I have plenty more sweatshirting in my stash for future pairs. I actually didn't get around to sewing up two Christmas pairs in cotton jersey to wear as PJ bottoms, so I may make them soon to avoid disappointment this festive season. Sewing to deadlines is my nemesis, so starting super early might be the answer. 

I'll leave you with this reel which highlights 12 of my favourite outfits featuring all four of my Hudson Pants pairs. What are your go-to loungewear patterns? I'd love to know, as my life definitely requires more of it since the start of the pandemic. 


When Josie from Fabric Godmother invited me to become an ambassador for the latest designs in their exclusive range, I immediately gravitated towards this stunning viscose sateen. As an ambassador I was sent the fabric for free and will get paid for my review, but the opinions I'm sharing are 100% honest.


I asked for 1.5m to make a top and it's even more beautiful in person than I could imagine. It's the most vibrant shade of emerald green with the sweetest peachy pink heart print that looks like an animal print from afar. Completely opaque, it's got a lovely drape and weight to it, as well as a satin finish.

Most surprisingly, this fabric holds a press really well, but I'd recommend a cooler setting on your iron. I'd also recommend using a rotary cutter, if you have one, and a fine needle is a must to avoid nasty snags.

I've never been disappointed with the quality of Fabric Godmother's own range and this viscose sateen is absolutely no exception.

After a bit of pondering, inspiration struck and I knew it just had to become a Papercut Sequence Blouse. I made a straight size 4 (disappointingly, this pattern isn't currently available in a more inclusive size range) with no alterations and the fit is great. 

The pattern is minimum effort for maximum effect, coming together really quickly and easily. As with any wrap garment, modesty is key. This one has you covered with an internal side seam button and a snap fastening along the neckline.


The coolest thing about the Sequence Blouse is that you can tie and wear it in a number of different ways. I actually think I prefer it with the 'V' at the back on me, but it's great to have such a versatile blouse in my handmade wardrobe. 

I've seen people tie it more centrally at the back, with the snap fastening undone for a sexy shoulder reveal, but I can't go braless so I'd have to wear a vest and ruin the look.


It sounds silly reading this back, but the Sequence Blouse really challenges my inexplicable desire for symmetry, so it's a bit out of my comfort zone in that sense. Nevertheless, it's such a pretty design and the fabric is truly sensational.


I took full advantage of the last of the sunny weather recently to photograph my Sway Dress, a Papercut Patterns design which doesn't seem to be readily available anymore. If you know why that may be, please do spill the tea.


Despite a major wobble halfway through construction, during which I convinced myself that I was making a frumpy nightie, this dress turned out to be a surprise summer hit. Once I added the waist tie, the silhouette was completely transformed, giving me some rather charming vintage vibes. 

I made it in this stunning viscose sateen from Fabric Godmother's own collection and I'm seriously considering buying the green colourway too. It's a slippery little sucker to work with, but a dream to wear. To make sewing with this fabric as smooth as possible, I used a microtex needle and slightly lowered the tension on my presser foot. 


The cool thing about this dress, other than having pockets of course, is that your can wear it back-to-front with either a V or rounded neckline. I've been wearing it this way round, but should really try switching it up for a different feel. 

I made a straight size small, moving the waist tie loops higher to accommodate my short waist, and I'm really happy with the fit. Next time I think I'll pinch out 1cm from the front and back necklines so they sit as flush as can be. I'm also tempted to raise the armscye by 2-3cm as it sits quite low on me, leaving a fair bit of my bra exposed.

It's a fairly quick and easy sew, definitely satisfying to whip up on a whim. Having never cut/sewn on the bias before, I did find levelling the skirt out after letting it hang overnight to be super tedious. If you have any tips for that, I'd love to read about them in the comments!


All in all, I feel really pretty in this dress...and that's not something I say lightly.


Can you believe I made these Tilly and the Buttons
Safiya Trousers in May 2020 and have only just gotten round to sharing them? They're more than a year old now and I made them three whole months before the dungarees version I blogged about here


The pattern is one of six featured in the Make it Simple book and it certainly is quick and easy to sew up. It has an elasticated waist with flat front, which is the perfect combo for a smarter look, as well as pockets and a relaxed culotte-like fit. 

If I remember correctly, I made a straight size 4 and shortened the length by 2-3cm. It's pretty spot on, but one thing I don't love about the design, is that the elasticated part of the waistband starts at the side front. On me, this adds volume to an area of my body which has enough natural volume already, so if I make another pair I'll start the elastic further back.


I endearingly refer to these as my clown pants because the print is pretty out there, even for me. It's a mystery vintage polyester fabric I picked up in Cyprus, with a satin-finish, subtle ribbed texture and a bit of stretch. Surprisingly though, they actually go with loads of things in my wardrobe thanks to their multicoloured nature.


Minor niggles aside, they're comfy, smart and fun...what's not to like really?


The cheese and pineapple hedgehog is done, Pina Coladas are chilling and this is my entry for the #SewSeventies challenge hosted by Georgie and Yvette. If I'm being honest, I think my pattern and fabric combination is a little too on the nose, making it feel a bit costumey. You can't win them all though and it makes a comfy house dress during warmer weather.


To be clear, there's nothing wrong with the pattern, which is the Pattern Fantastique Vali Dress and Top. I just think that paired with this vintage 1970s cotton voile it's a bit much on me. Also, despite being a beautiful design that looks fantastic on everyone else I've seen wearing it, as I suspected, my proportions make it difficult for me to carry off this silhouette.

For reference, I made a size 14, shortened the skirt by an inch and the fit is pretty spot on. The pattern comes together quite quickly, but sewing the yoke and getting neat corners on the sleeves can be quite fiddly. The grown-on pockets make for an interesting and speedy construction, but I think I prefer the finish of the traditional method. As a hopefully helpful aside, despite having child-sized hands, I actually found the pocket opening to be on the snug side.

The written instructions can seem a little overwhelming, even though they include some really useful tips for steps like hemming, so I'm extremely grateful to Sara SJ Kim for sharing this brilliant step-by-step sew-along, which I followed from start to finish. 


You can't tell in these photos thankfully, but my fabric is VERY sheer, so that's another reason I won't be wearing this 'out' out. Instead, I'll happily channel my grandma as I clean the house, but my Vali Dress would also make the prettiest beach cover-up. Looking at this last photo, I wonder if making a belt from my fabric remnants would encourage me to wear it more. What do you think?


I've had this Liberty lawn in my stash for at least eight years and I can't tell you how many times I've rescued it from multiple destash piles at the very last minute. I've never known what to make with it, but something kept me from parting with it and the stars finally aligned.


Inspiration struck when I spotted the beautiful button down blouse below from & Other Stories and realised I could totally make my own using the Nina Lee Bakerloo Blouse. At first I was hellbent on finding a similar green floral fabric, but my search was futile so I reluctantly settled for my Liberty lawn. I don't know why I was so reluctant because I couldn't be happier with the result.


Just like my first Bakerloo Blouse, I made a straight size 12. This time I opted for the shorter sleeves and I shortened the bodice by around 8cm. As much as I love blouses tucked in on others, my proportions make it difficult for me to carry that look off, so I tend to prefer my tops on the shorter side and untucked. I'm tempted to go even more cropped next time. And yes, I could have hacked the pattern to add a button front, but I couldn't be bothered and I love it just as it is.


As I ponder all the potential Bakerloo Blouses in my future, I'm beginning to wonder how many Bakerloo Blouses is too many?